

How To Set Timer On Iphone 11 Camera
Did you ever wonder how to take sharp, high-quality photos with your iPhone in low light, or a group shot with you in it? Whatever your goal, the camera timer found in the native camera app is most likely the solution. Read on to discover how your iPhone camera timer can help you take much better photos.

Access The iPhone Camera Timer
The iPhone camera timer is found in the native camera app, located at the top of the screen. Here, you can choose from a 3-second timer, or 10-second timer, as illustrated below.
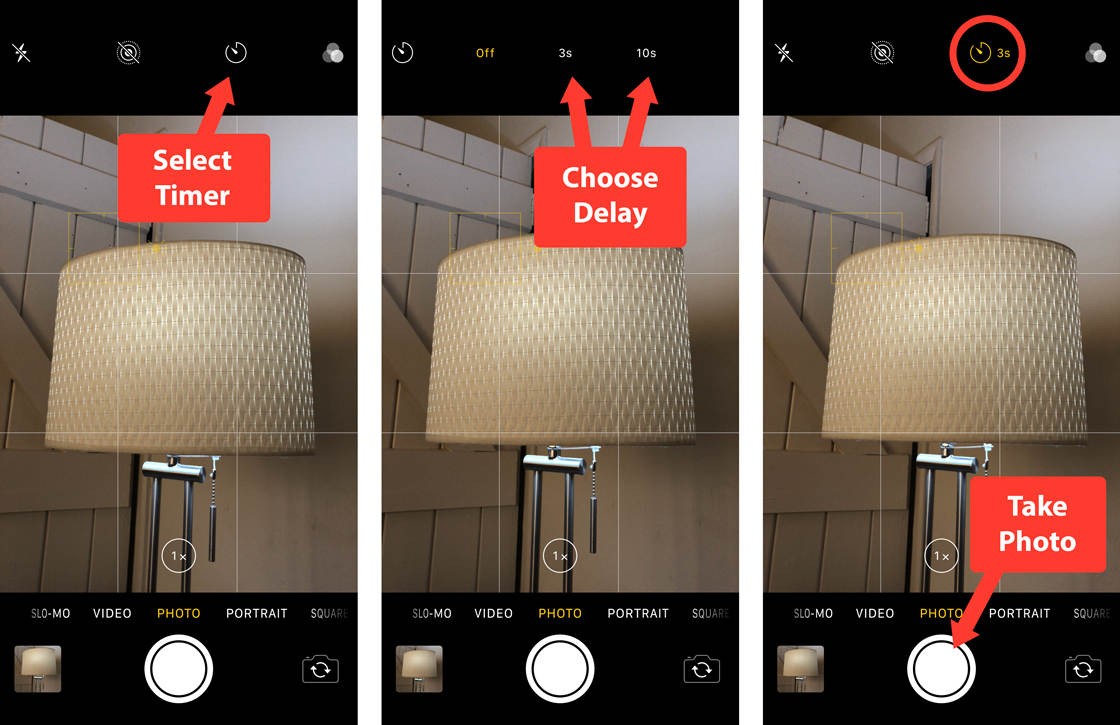
1. Select the timer, 2. Choose Delay, 3. Take The Photo!
Set The iPhone Camera Timer & Take The Photo
The number of seconds represents the delay between you pressing the shutter button and the camera taking the photo.
Choose the 3-second delay for all situations where the scene is set and you don't need to be in the shot. This avoids camera shake caused by pressing the shutter button. With the timer set, any camera movement caused by you pressing the shutter button will have gone by the time the timer triggers the shutter, 3 or 10 seconds later.
Use the 10-second delay if it's a group shot, and you want to be included because this gives you some extra time to dash back to the group and get comfortably posed.
It's difficult to get a group shot where everyone is ready for the picture, so remind everyone to close their eyes until it's necessary to keep them open. Also, when arranging your group subjects, leave a space for yourself!
Once you've set the iPhone camera timer, check your subject is ready and that you've framed the subject well, simply press the shutter button.
When the camera takes the photo using the timer, it actually uses Burst Mode to take 10 photos. The camera app chooses the best one, based on which is the least blurred, but you can choose to keep or discard any or all of the 10 photos in the iPhone photos app.
Use A Tripod With Your iPhone Camera Timer
An iPhone tripod, together with an iPhone tripod mount, can make a huge difference to the quality of your photos. It will help reduce the effects of camera shake caused by unsteady hands. This is especially true for low light situations where the shutter speed will be slower.
A dimly lit iPhone photo taken using self-timer and a tripod, increasing stability and clarity greatly
Try These iPhone Camera Timer Exercises Out Yourself
The iPhone camera timer is best used in scenarios where there is a large group of people, low lighting, or a combination of the two. Here are some of the most common scenarios where the camera timer can be really helpful, with exercises you can try:
1. Shoot A Group Shot
- Get everyone positioned and posed properly.
- Set your camera timer to 10 seconds.
- Press the shutter button.
- Count down the timer out loud as the iPhone's flash turns on and off repeatedly to show you the timer is active.
- Call the group to action ("Smile!" or "Jump!") when the iPhone's flash stops flashing and stays on.

A lovely family group photo, with the photographer in the frame too!
2. Shoot A Landscape
- Find your favorite landscape and mount your iPhone camera on your tripod.
- Set your camera timer to 3 seconds.
- Frame the shot as you think best.
- Tap and hold on the screen where you want the main focus to be.
- Adjust the brightness so you don't have any overly bright areas by tapping once on the screen and dragging your finger down or up until you're happy with the brightness.
- Press the shutter button.
- Remember to remove your hand away from the iPhone as soon as you've pressed the shutter button so that you don't create any unwanted camera shake.

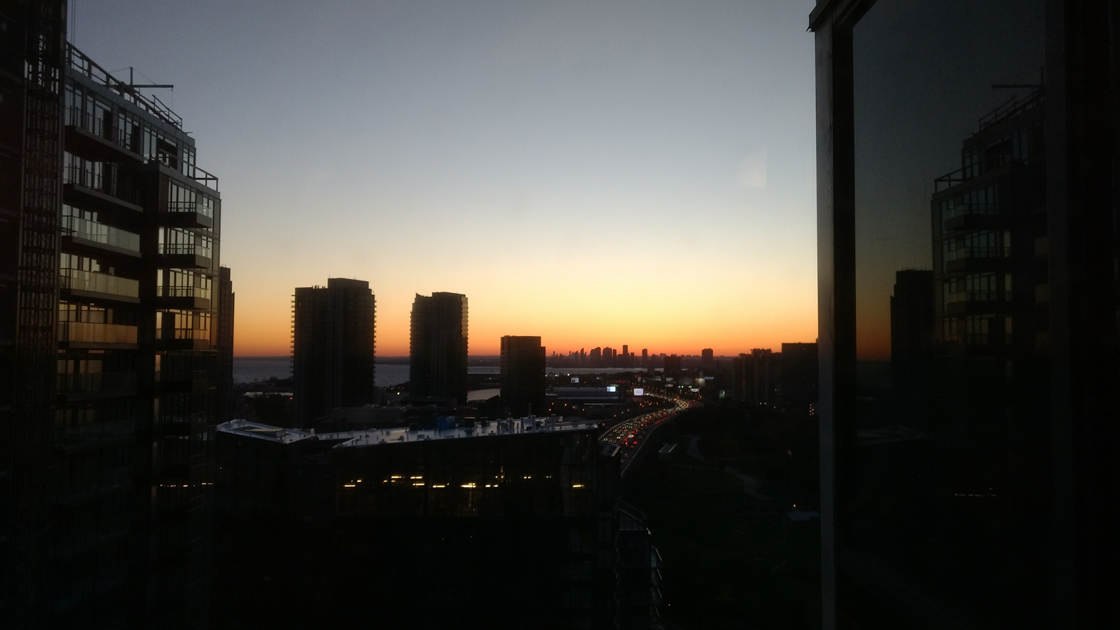
A challenging, low-light scene, captured with the camera timer and a tripod.
3. Shoot A Nighttime Scene
- Using a tripod, set up your phone at a good angle and on a flat surface.
- Set your camera timer to 3 seconds to reduce shake in your shot.
- Press the shutter button.
A low-light landscape shot with a tripod and 3-second timer
4. Take A Self-Portrait With The Rear-Facing Camera
Instead of using the lower-quality front-facing camera on your iPhone, you timer lets you take self-portraits using the rear-facing camera.
- Position your iPhone securely (on a tripod, ideally).
- Set the timer to give you enough time to get into position – most likely 10 seconds.
- Press the shutter button.
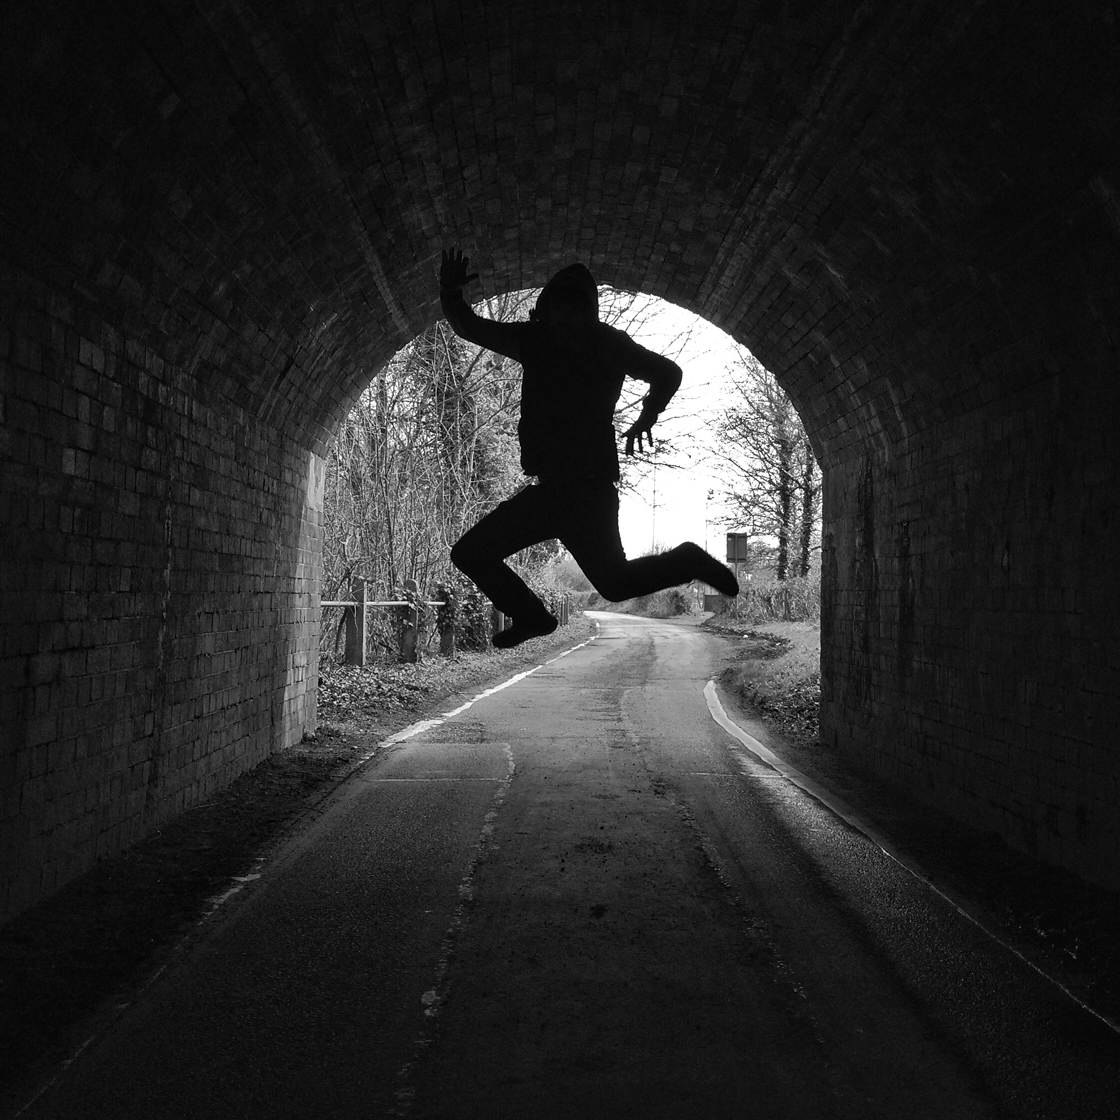
Yours truly taking a leap in the dark. Literally!
5. Take A Long Exposure Photo
- Mount your iPhone on a tripod.
- Point it at something that's moving – such as a waterfall, waves on the sea, people walking around a shopping mall, leaves swirling around in the wind.
- Turn Live Photos on.
- Press the shutter button.
- Once the photo has been taken, use the Long Exposure effect to turn the 3-second video clip you get with a Live Photo into a stunning long exposure, like the one below.

Waterfalls captured using Live Photos, with camera timer and a tripod, and converted using the Long Exposures effect.
6. Photograph A Close-Up Shot Of Nature
Use a tripod and self-timer to photograph a gorgeous close-up object, such as a flower. This will help stabilize the shot and reduce any camera motion blur. Focus on certain details, such as water droplets, and see how close you can get to the object while keeping it in focus.
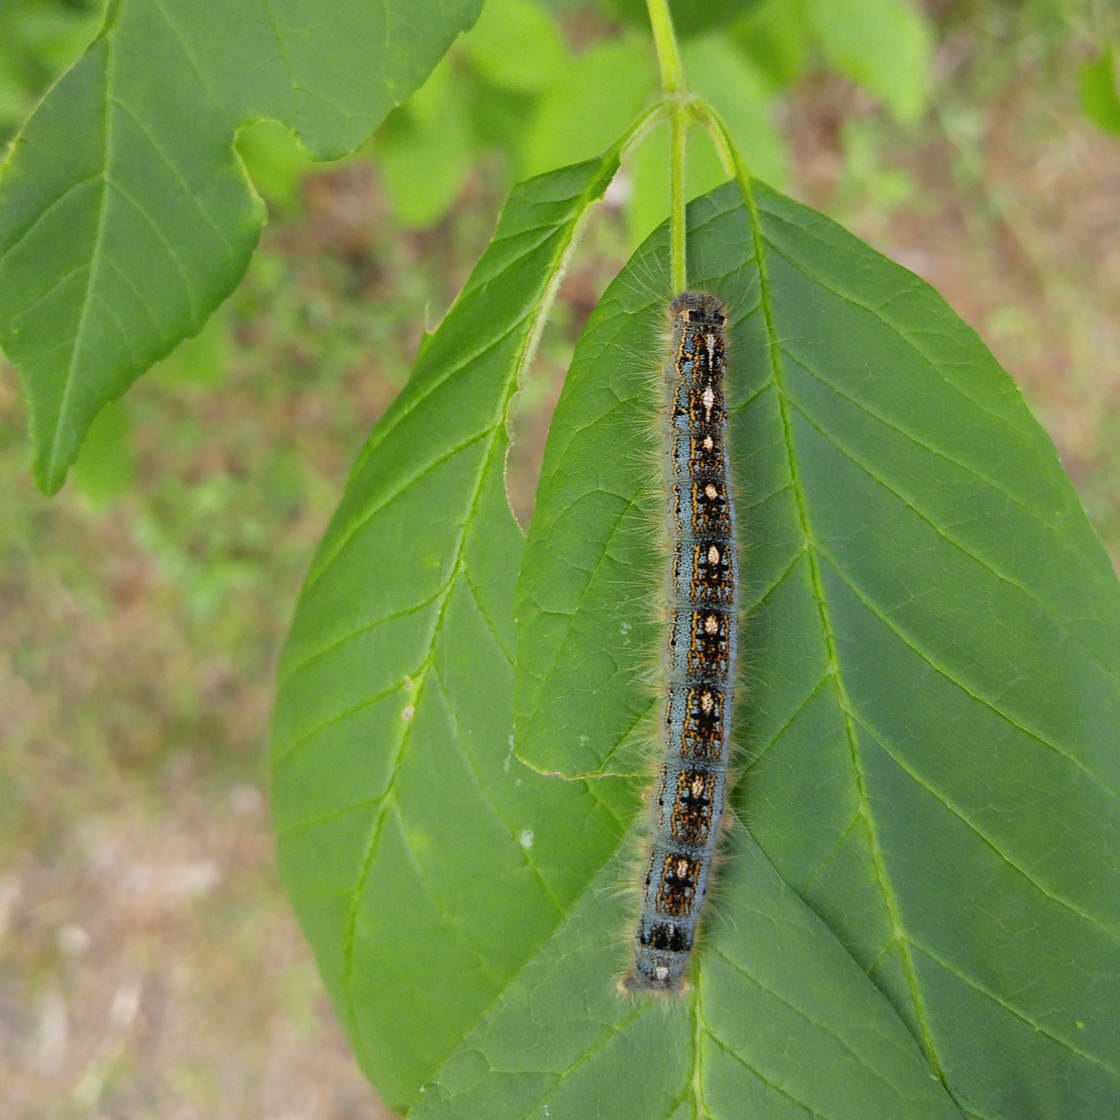
Macro detail of a caterpillar on a leaf
Next Steps
Ensure the intended subjects are in focus before pressing the shutter button. Next, tap and hold on the screen to lock focus. Try to ensure that all the subjects you want in focus are a similar distance away from the camera, as this will help keep everyone in focus.


These group photos illustrate when not all of the subjects are ready, and one where everyone is posed; the key is taking continuous shots!
Check the corners of the frame to ensure that the picture does not catch any unwanted objects, such as trash on the ground, or even dust and debris on the lens itself.
Important: It's always best to take the photograph with the rear-facing lens because, regardless of which iPhone you have, it's the better quality lens.
How To Set Timer On Iphone 11 Camera
Source: https://iphonephotographyschool.com/iphone-camera-timer/
Posted by: beckexes1949.blogspot.com
0 Response to "How To Set Timer On Iphone 11 Camera"
Post a Comment